Wednesday 4 December 2013

Bringing your espresso anywhere - not your average espresso

If you have followed my previous blog entry, you will know that I have an orange color lever vintage machine. But as perfectionist coffee lovers, we are always constantly looking for something better, trendier and newer. ;P So this portable espresso maker has caught my attention ever since it came out last year.


It's called Rossa PG and in a sense, it's conceptually similar to Mypressi Twist that is more popular, which is another portable espresso maker that is known to make decent quality coffee. The downside of Mypressi Twist is that you have to buy the disposable cartridges which can quickly adds up the cost, not environmental friendly too! And the barista has to pay attention to the brew temperature due to heat loss. Both of which issues are solved in Rossa PG and additionally, it has the brew pressure gauge and pressure regulator for pressure profiling!

So now I will guide you through what you will need to make an excellent espresso portable:


In short, you will needs:
i) Rossa PG
ii) Portable grinder - I am using Rosco Mini.
iii) Fresh Roasted Beans
iv) Immersion Heater or Kettle

Optional - to make your espresso more consistent:
i) Weighing scale
ii) Thermometer


Steps:
You need to precharge the Air Cylinder. The air cylinder is like your battery, it keeps the 'energy'/ pressure you need to make espresso.


You can either choose a big floor bicycle pump, electric pump, or hand shock pump (the one I have). I chose a hand shock pump for portability and it can get up to 20 bar reasonably. 19 bar of pressure will allow you to make 3-4 shots.


Weigh your beans. 16-18g fits nicely.


Tamp it as you would on a normal espresso machine


Connect/screw the air cylinder to the Rossa PG chamber.


Invert the Rossa PG and preheat it. For preheating, the procedure is 20-5s rule. 20 seconds for first preheat, discard it. 5 seconds for the second preheat, dump it. Third pour of hot water will get you nicely into 93-94 Celcius, and it holds the temperature very steadily there.


Put on your tamped coffee. A fresh roasted coffee will not fall off even if you invert - so don't worry!


Get your shot glass and start pouring. You can choose the pressure you want by varying the valve on the air cylinder (Pressure regulator). You can brew from 0.5 bar preinfusion to 12 bar extraction if desired. Lots of pressure profile possibility here.


For clean up, the puck will come off nicely. Overall, very clean and little to no-mess espresso.

Best of all? Take a immersion heater and make it in your hotel room. : )


This is a video I made last month to show Rossa PG in action.


Sunday 18 August 2013

How I roast my own coffee - Home Roasting DIY

Hi coffee lovers!

Ever thought about how to up your game in your coffee journey further?? Here's how for under Rm100! Don't worry, no string attached! ;P What I am going to show you is how you can roast good coffee at home with minimal investment.

What you need:
i) Copper Ball from Ace Hardware - RM 30
This is the major component you'll need - A copper Ball

I have a confession to make-----actually, this is meant to be a toilet float... But hey, let's make use of it before it really does go into someone's toilet!

ii) Black Plastic Handle, also from Ace Hardware -RM 8
iii) Aluminium Wire 3 Meter, Ace Hardware is your friend again - RM 3
iv) U-shaped hook used normally for ceiling fan, obtained from Home Depot near my house - RM 5
Pic: U-hook. Ignore the metal plate. I took this photo from the internet as I forgot to take photo.

v) A pipe saw - Already have this one, so free!


Pic:Pipe Saw

vi) and some other common tools you will most likely have at home 


Contrusction Proccess:
Once you gathered all the components, it's really easy. Just pop open the copper ball and give it a deep clean inside. Mine is clean but it's never harmful to be on the safe side! You may need a plyer to do open it up. While it's open, let's make a hole at one half of the ball for a hole loading the green beans. Put it back together.

Pic: Hole for loading your beans. You can skip this step if you can magically teleport the beans into the copper ball. *wink*


After that, cut the U-hook into a straight shaft and stick it to the Plastic Handle. Once that's done, screw the handle into the copper ball. Done!


Oh oh, we're actually not quite done yet. The last key you need is a stand for supporting your roaster while roasting on the stove. For this one, it's up to your creativity really. With my lack of design talent, this is what I've came up with. For RM3, I am not going to complain, so long as it works. Haha!


For additional safety step, you may want to do a few sacrificial roasts to coat & clean the inner chamber of the copper ball. Also to get a hang of how the roaster respond to flame changes.


Into Roasting!

Once you're done with the sacrificial roast, remember to keep a roast log and try to take as many notes as possible. Then for your first step, learn to get consistent and then only make changes.

The size of this roaster can roast about 50g-150g no problem. Maximum it could probably go 200g but haven't tried at this point. From my experience, I prefer roasting 100g as that gives me a week of coffee and giving me more learning experience. I will upscale it once I am getting better at roasting.

The best of all is it's very cheap & easy to make. And with a little practice, the result will be just fantastic! No longer you have to
Pic: A full city roast. 


Here's a video to satisfy those who are eager for how it actually works:


If any of you do decide to try it out, let me know how it goes for you and we can share some roasting tips!


P/S: My inspiration actually came from this roaster (FZ-RR-700 -Click the link) from Israel.


Monday 24 June 2013

Rosco Mini from the Portapresso

Hi all,

One of the many things I enjoy in coffee is the hand grinding process. For hand grinder, we are very familiar with Hario Mini and the Hario Skerton, and we also have the Tiamo hand grinder - looks suspiciously similar to Hario design. Then there is plethora of antique hand grinders - the box mills, the brass turkish grinders, etc. In my opinion, one thing that most of these hand grinders lack is the build quality and precision. Very often there is some wobble in the burrs that cause inconsistent grind sizes in the coarse range and the non-sharp ceramic burrs(modern hand grinder) crushes the beans instead of 'cutting' through them. These reasons are exactly what draws me to the Rosco Mini from Portapresso, Australia.

Pic from Portapresso


The Rosco Mini is machine-cut from a piece of brass stock, and the grinder body is cut precisely to ensure (or at least close to) perfect alignment which eventually maximize the performance of the grinder for consistent grind.


Pic: The hero of the day - my Rosco Mini


The first impression I received the Rosco Mini is "damn, this is some serious weight!" With the compact foot print that is close to Hario Mini, it actually packs at least 3 times more dense than the Hario, at 1kg! And you may have already noticed, the Rosco Mini is a very shiny and elegantly made grinder. It's probably the most beautiful coffee thing that I've put my hand on!


Using the grinder

Setting grind size:
This is, in my opinion, the strongest feature on the Rosco Mini, of course next to its beautiful design. With the engraved-marking on the grinder body, it delivers the most precise & REPEATABLE stepless(repeatable yes, stepless yes, but not repeatable stepless) grind setting on all the grinders I have used so far. The grind setting is adjusted by turning the lower grinder body to the desired setting. The distance between each step is measured by the opening of the inner and outer burrs by 0.05mm. This may sound a little technical but once you get your hands on the grinder, it's very intuitive to use, at least to me.

Pic: The grind setting. The top seems like a double shadow but it's actually the reflection.

Bean loading:
It's done by unscrewing the top and invert the grinder to pour the beans in. Very easy especially if you single dose.

Grind effort:
The grind effort is debatable and a very subjective topic. But I find it relatively easy to grind because the diameter just fits into my hand nicely, allowing a firmer grip. Another plus is the Rosco Mini is noticeably quieter when compared to OE Lido, which is already quiet by itself!

Grind retention:
As expected, there is almost no grind retention on the grinder, probably about 0.1g of coffee maximum from the first ever grind. Subsequent grinding will yield much closer to 0.0g retention. No kid! Ocassionally when time are bad where there's lots of static, it will retain about 0.2g at the bottom part. But that's about it.

Pic: The bottom of the grinder


Maintenance:
Given the beautiful appearance of the Rosco Mini, inevitably some level of care needs to be given to keep it in pristine (read: gold shiny) condition. I did not realize the importance of keeping the grinder free from any water drops for the first few days. Thus some dull water spots quickly formed. But luckily, these spots are easily removed by some light-polishing & buffing. Now I am happy to report it's been almost 2 weeks and the Rosco Mini is still a piece shining gold.

Grind time:
At the espresso grind, I found that 10g of beans takes about 70 turns of hand cranking (from start till the handle spins freely). Can be done about 30 seconds, a reasonable speed I would say.


Pic: The Lido is BIG compared to the Rosco Mini, more so than it looks in the picture.

Pic: Credit to Coffeesnob forum for the pic. Just to show where the Rosco Mini stands in term of size.


Conclusion:

The Rosco Mini is a top notch performance and looking really sharp! Repeatable & stepless grind setting, plus the look, is probably what sets it above most other grinders for me. The only downside I could think of is the price, but honestly, this is an almost-perfect grinder in my book. I would definitely buy it again and recommend it to others, if financially allows.

Sunday 9 June 2013

My Journey with Coffee Grinders

Just this weekend, I've finally received one grinder that I've been eye-ing all year long but never pull the trigger because of the price. And eventually, I gave in and bought it with my salary incentive. ;P A clue: It's name is Rosco Mini.

This is yet another hand grinder into my collection. Ever wonder why I am so into hand grinders? Let's do a little bit of reminiscent shall we??

I started my espresso journey with a mere Capresso Infinity. It uses 38-mm conical burrs and has stepped adjustment. It has a black and white theme which looks like beautiful piano. Being in for espresso, the stepped adjustment is sufficient but not perfect. If you have used any grinder before, you will know that grind retention is always the bane in all electrical grinder. For specialty coffee, we strive for freshest coffee and yet there is this some ground coffee that remained in the grind path, that you cannot get it out no matter what. Needless to say, this is also the same story in the Capresso.

Pic: Cappresso Infinity

Staying in the United States at that time, I have abundant access to their second hand grinder market. Subsequently, I upgraded my Cappresso Infinity into a used La Pavoni PGC. It also uses a 38mm conical burrs, a little bit different because it's using a burr design that was coined as Trespade burrs. These burrs are supposedly designed for espresso grinding, and can produce admirable result in the cup. The apparent upgrade, for me, was that it has a stepless worm gear adjustment. This means that you can make a very fine microadjustment to change the grind size and get the perfect flow on your espresso machine. All is good at this point huh? Wait until you turn on the grinder - the thundering sound of this grinder will almost make your neighbor start packing - they thought the apartment is falling apart. Performance wise, it's decent. But there is this quirk of super loud noise as well as the grind retention that made me do another upgrade sooner than I thought.


Pic: La Pavoni PGC Grinder


At that time, I was very active in Coffeegeek forum. It was my fountain of knowledge that time and I spent like half of my awake time reading it. There's so much info out there! Very often, I bumped into the name Super Jolly. It was mentioned over and over again. And I thought the name was very jolly-jolley, very christmas-ey. The Super Jolly was so called the standard in cafes for espresso grinding. So I started paying attention on Ebay for these. Lucky enough, there're plenty of these floating on second hand market due to Starbucks' decision to dump them, in favor of super-automatic machine. I've managed to secure one of these for around USD 200 with shipping cost.

Pic: Mazzer Super Jolly

Super Jolly is manufactured by Mazzer company in Italy. These beasts are no kid man! They are tough as rock and can suffer the most harshest abuse from any cafe and yet make through in one piece. The outer shell is rock solid, the adjustment is controlled in a stepless manner through their threaded collar. As they say, it is the standard of espresso industry. Very tough and quality.

With my Mazzer Super Jolly still performing, I got myself into another good deal of Mazzer Major, less than USD 300 for high end commercial grinder! Super Jolly is using a 64mm flat burr and Mazzer Major is its big brother, a 83mm flat burr! It grinds faster, and everything else is a step meaner as compared to its little brother - including the size!

Pic: Mazzer Major. It may not be very obvious, but this grinder is HUGE, more so with the hopper on

Both the grinders are good. But as mentioned, there's a common theme between them - the grind retention. I single dose mostly at that time and so getting 16g out of 18g beans I put in just doesn't feel right. With both the grinder, I have to develop a routine, a ritual, to brush out the grind that is retained in the chute.  The brushing ritual works, but it's a hassle and definitely not the most elegant solution.

And later on, there's this 'most innovative grinder of the year' Baratza Vario that garnered a lot of positive feedback from the Coffeegeeks. After digging through Ebay for quite some times, I eventually bump myself into a decent deal. The Baratza Vario uses a ceramic 54mm flat burr. The ceramic burrs doesn't look very robust, but the proof is in the cup. Some said it is almost on par with Super Jolly in the cup due to its unique burrs design. And most importantly, it is famous for its low retention. With about 18g beans in, I can easily get 17.8g out. Good enough I thought. But as everything, there's always something to complain about. Because the Vario is made from mostly plastic and it is using a Macro-Micro adjustment, the grind setting isn't very robust. It is a hair less intuitive to dial in as compared to other grinder and it requires more grind adjustment from day to day. For me, that is a deal breaker because that would waste a lot of coffee bean and I am stingy on that(being a poor student what). ;P

Pic: Baratza Vario

Then, I came into this thread. This thread basically got me interested into trying hand grinder. And so I did. My first grinder that I ordered was a Armin Trosser. It was a box coffee mill that is made of wood. My first impression was that the grinder look nice. After loading beans into the chamber, the crank is so difficult to turn. And at its finest setting, it's obvious it couldnt grind espresso as advertised by the ebay seller. And off it go, back to its owner. Thanks to the seller that keeps to his pride and word.Though I don't think I will ever get another similar box mill again, this hand grinder experience definitely got me hooked.


Pic: Armin Trosser vintage coffee grinder

Maybe it's fate, then there is a new hand grinder - OE Pharos,  that was designed from scratch was born in the house of OrphanEspresso. It is using the Titan-sized conical burrs at 68mm. In espresso, Titan Conical burrs are said and proven to give the best flavors separation and to showcase the single origin coffee best. As you would imagine, I was dying to have one. But owning a Titan Conical grinder is a dream to me at that time, due to the price mainly. Even a used 68mm conical burrs grinder will cost upward of USD 1,000, and not to mention the shipping cost for its size. This 68mm-burrs Pharos comes new at USD 245! It's a fraction of the price of its counterpart, of course minus the motor. I followed closely the owners' review for some while before deciding to get one myself.

Pic: OE Pharos

True enough, as they claimed, the flavors from these burrs are indeed better. But most importantly, it is the other aspects that got me seriously addicted to hand grinding. First, the grind retention is almost negligible. 18g in 17.9g out, sometimes 18g. Grinding motor noise is almost non-existence, except the beautiful sound of the coffee beans cracking inside the burrs. And knowing that the grinder will basically work for a long long time, due to the absence of motor, keeps me a very happy home barista. Another feature of these Titan sized grinder is that they have a larger sweetspot for grind size. You know when you're doing espresso, you have to make fine tweaking to the grind size day-to-day due to the beans aging right? With titan sized grinder, guess what? You don't have to do that or you'll just be doing very very minor tweak. This is just part of the unexpected pleasant surprise.

Eventually, when I finally came back to Malaysia after my graduation, I started my coffee journey again. This time, undoubtedly, my first choice would be hand grinder. Partially due the low retention, and also the durability aspect of a hand grinder. You will never know when the motor will die. It happened to my Cappresso Infinity once but luckily it got replaced under warranty. In Malaysia, if that happens, I suspect the part is difficult to obtain and most likely be very expensive. So, I think I can survive without the motor. ;P A Hario mini was limping along with me for a short while but we said goodbye very soon because of the plasticky built and inferior grind particles.

Thus, I got myself another innovation from OrphanEspresso. This time it was their Lido grinder. It utilizes a small 38mm conical burrs grinder. I know, it's not the Titan sized. But given the budget, this will be good enough, as better coffee will give off better result than a better grinder. And I am not particularly super fussy on this as long as it's a decently pulled shot.

Pic: OE Lido Hand Grinder

It's true that you have to work out a little using these grinder as compared to pressing one button. But for the better quality coffee(zero retention) and cheaper cost, why not? Plus, by hand grinding you get a feel of the coffee beans, whether it's hard or soft, or whether you're grinding too fine. You actually can pick up those senses. These actually gives me a sense of satisfaction. As they said - hand ground, hand-pulled, hands down! 

p/s: I may be adding another 'hand roast' before the 'hand ground', on a 'hand picked' coffee. Hahaha! Will talk about my home roast effort in coming posts.

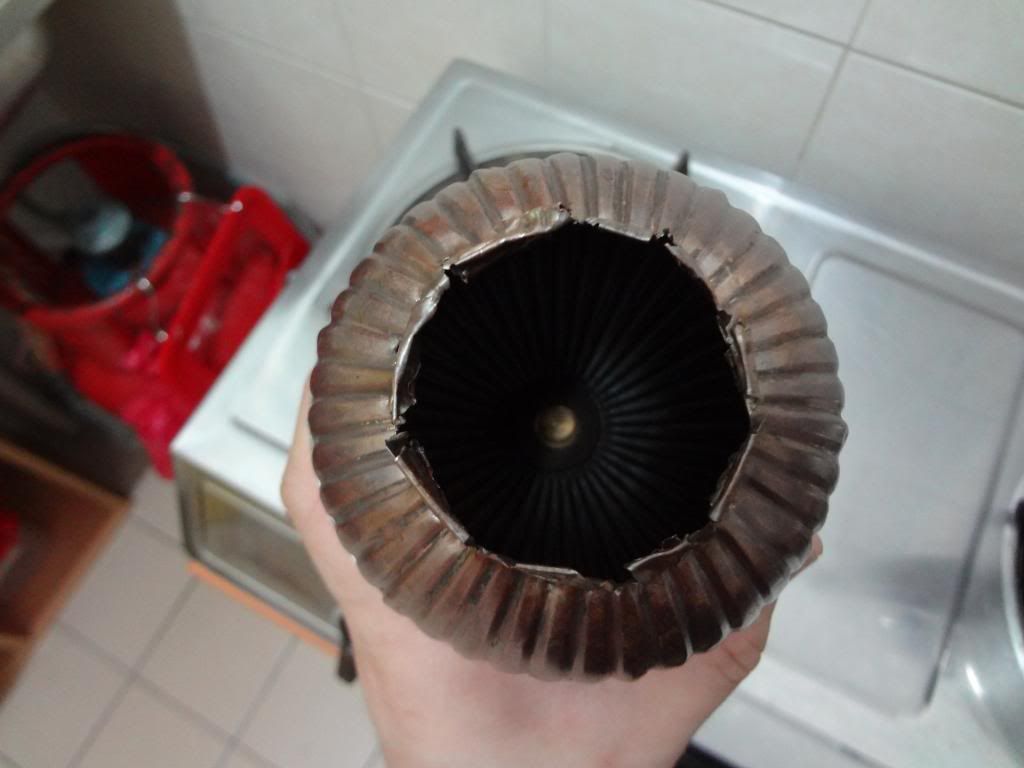
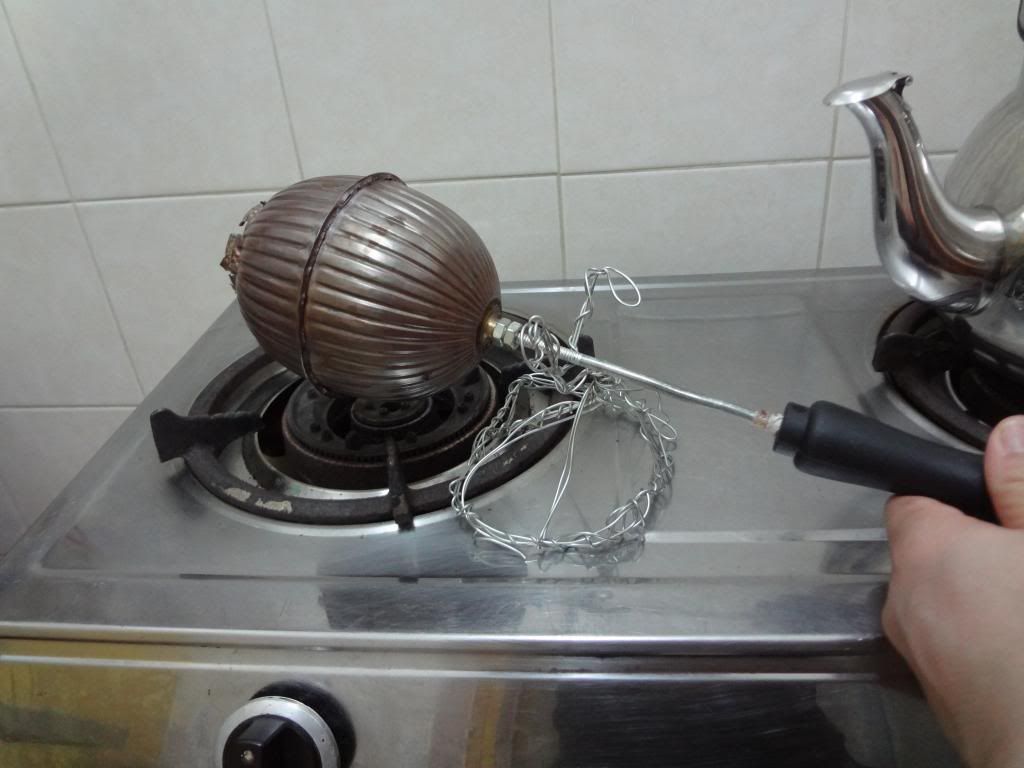
Lastly, a little sneak peak. ;D Back to the topic, I've just received my Rosco Mini grinder from Ross in Australia as I mention in the start of the entry. First thing first, it's an work of art, and quality! Very precise hand grinder made using solid material and attention to detail. It may looks like the vintage turkish hand grinder, but that is far from the truth - the Rosco mini is on another level!  Next time


Wednesday 27 March 2013

Busy as bee ;(

Dear bloggie,

There're so many things I would like to share but life is soo busy flying here and there. Please forgive me and will update soon. :P

Friday 1 March 2013

My Cup Obsession

Any true coffee lover will understand the importance of serving properly brewed coffee or espresso in the right cup. It will not only enhance the overall experience of drinking the coffee, but also make the drink more tasty (Trust me!!). Inevitably, some of them eventually got into the rabbit hole of searching for the perfect cup. And shamelessly, yours sincerely is one of the cup obsess. :P


Here's some of my cups galore:

Start with my top favorite!


Name: Illy Nude Crystal Demitasse
Source: Illy USA
Capacity to rim: ~2.0 oz/60 ml
Price: USD 40 / piece


Name: Illy Frosted Crystal Demitasse
Source: Illy USA
Capacity to rim: ~2.0 oz/ 60 ml
Price: USD 40 / piece


Name: Orphan Espresso Inker Demitasse
Source : Orphan Espresso, USA
Capacity to rim: ~1.75 oz/ 55 ml
Price: USD 3 / piece


Name: Orphan Espresso Inker Cappuccino Cup
Source: Orphan Espresso, USA
Capacity to rim: ~ 6oz / 180ml
Price: ~USD 8 / piece

Name: Ocean Crystal Espresso Demitasse
Source: Full of Bean, Penang
Capacity to rim: ~2.0 oz / 60 ml
Price: RM 15 / piece

Name: NoBrand Espresso Demitasse
Source: One Utama - Cup: Aeon & Saucer: Live it up!
Capacity to rim: ~ 2.5 oz / 75 ml
Price: RM 10 / piece


Name: Cuisinox 10 Oz Latte Cup
Source: Ebay
Capacity to rim: 10 oz / 300 ml
Price : ~USD 6 / piece

Name: Cuisinox 5 oz Tulip Cappuccino Cup
Source: Ebay
Capacity to rim: 5 oz / 150 ml
Price: ~USD 5 / piece


Name: NoBrand shot glass
Source: Ikano
Capacity to rim: 1 oz / 30ml
Price : RM 5.90 / piece


The cups I used to own...(and more!) =/


 My current favorite:


Disclaimer: I am not selling anything and the price is only indicative price at the time I got it. And the capacity was also based on the measurement I did last time based purely on my memory. By no mean they're absolute.


Saturday 23 February 2013

Tipsy Brew O' Coffee

Other than CAFFEine; ,  there is another cafe in Setiawalk that I have yet to visit. A very fancy playful name it has - Tipsy Brew O' Coffee. Whenever there is a new cafe addition in Puchong, I am always full of delight and expectation!! Of course hoping it to be my fresh roasted coffee supplier and my go-to cafe whenever I don't feel like brewing at home. But of course the second reason is very very unlikely, as brewing the coffee yourself is half the fun!

Pic: Exterior of Tipsy Brew O'Coffee


Inside Tipsy Brew O' Coffee, you're greeted with very cold air cond (haha, it was sunny hot outside). The wall decoration and lightings make the whole place feels cosy inside. On the coffee shelf there is a few antique hand grinders with coffee brewing equipment, just pure eye-candy for coffee lover like me. :D


From the outside, you would think that this is a place that serves only coffee and probably a few varieties of cakes. But in the actual, there're so many others food and drink choices, even if you're allergic of coffee, you will most likely to find yourself a favourite here. :) There are nutrition drinks, teas, cakes and countless other food. Anyhow, today my mission today is just for the coffee, no other.


They're serving many single origin coffees, ranging from the Java, Brazil, Kenyan, Ethiopians, etc. The price at a glance is a bit steep, with the Java at RM12.90 + tax up to RM20.90+ tax for the Kenyan & Ethiopians. Brewing methods include pour over, French Press and Siphon.

The one that caught my eye was this Ethiopians Ninety Plus Amaro Dernaye, at the top line of RM20.90 + tax. So I guess I shouldn't go wrong with it since it's a Cup of Excellence (COE) coffee scored 90+, brewed with my favourite technique French Press. 


However, at the steep price at RM20.90, or RM23 after tax, the first sip was surely disappointing. I was expected to be bombarded by complexity of typical Ethiopian, so much more that I am tasting a 90+ graded Ethiopian. To be honest, it has not much dimensional and actually tasted quite flat. A trace of staleness was present, but not very noticeable in the subsequent sips. The brightness was even very subtle in the first few sips. As the cup cools, some pineapple surfaced and the acidity is more noticeable. But that was the most exciting part about the whole coffee. A pale bitter aftertaste lingers. Suffice to say, I am very disappointed, especially with the price. And I am wondering how old was the coffee beans that I was served. Unfortunately, that's the sad thing with cafe business. If the coffee beans don't go fast enough, it will go stale, even if it's an excellent coffee to start with.


Pic:The barista preparing my French Press

The consolation is, the service and the people are quite friendly here. The lady boss at one time did come and asked how was my coffee. What else can I say at the moment other than "it was ok..". 


Tipsy Brew O' Coffee is probably a good place to hang out with friends, to have meals there. Coffee wise, it's not so bad but definitely it's won't make to my top list. They're serving popular Italian Lavazza coffee with their espresso machine too. But I am certainly not so keen on trying that for now..