Ever thought about how to up your game in your coffee journey further?? Here's how for under Rm100! Don't worry, no string attached! ;P What I am going to show you is how you can roast good coffee at home with minimal investment.
What you need:
i) Copper Ball from Ace Hardware - RM 30

This is the major component you'll need - A copper Ball

I have a confession to make-----actually, this is meant to be a toilet float... But hey, let's make use of it before it really does go into someone's toilet!
iii) Aluminium Wire 3 Meter, Ace Hardware is your friend again - RM 3
iv) U-shaped hook used normally for ceiling fan, obtained from Home Depot near my house - RM 5

Pic: U-hook. Ignore the metal plate. I took this photo from the internet as I forgot to take photo.

Pic:Pipe Saw
Contrusction Proccess:
Once you gathered all the components, it's really easy. Just pop open the copper ball and give it a deep clean inside. Mine is clean but it's never harmful to be on the safe side! You may need a plyer to do open it up. While it's open, let's make a hole at one half of the ball for a hole loading the green beans. Put it back together.
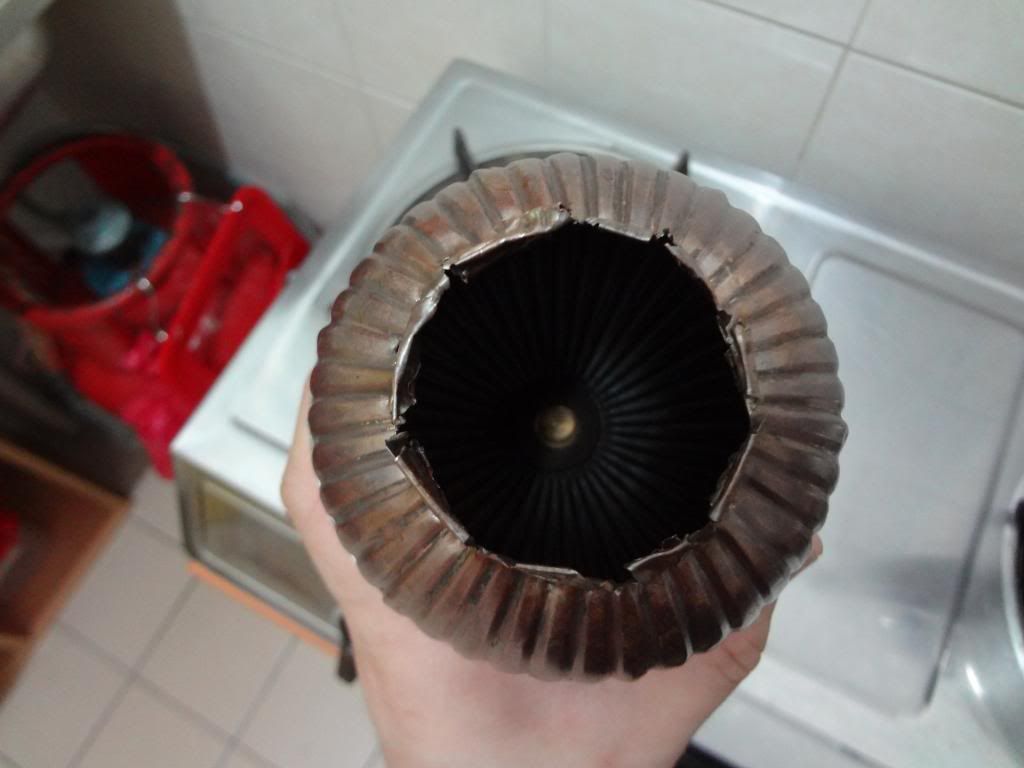
Pic: Hole for loading your beans. You can skip this step if you can magically teleport the beans into the copper ball. *wink*
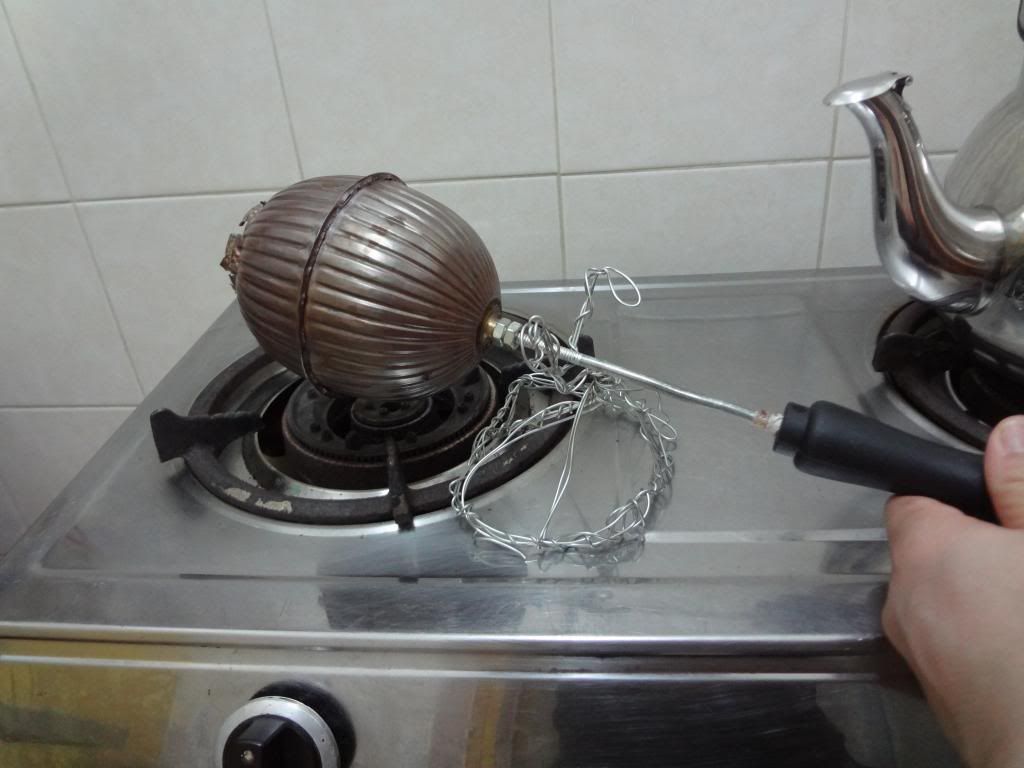
After that, cut the U-hook into a straight shaft and stick it to the Plastic Handle. Once that's done, screw the handle into the copper ball. Done!

Oh oh, we're actually not quite done yet. The last key you need is a stand for supporting your roaster while roasting on the stove. For this one, it's up to your creativity really. With my lack of design talent, this is what I've came up with. For RM3, I am not going to complain, so long as it works. Haha!
For additional safety step, you may want to do a few sacrificial roasts to coat & clean the inner chamber of the copper ball. Also to get a hang of how the roaster respond to flame changes.
Into Roasting!
Once you're done with the sacrificial roast, remember to keep a roast log and try to take as many notes as possible. Then for your first step, learn to get consistent and then only make changes.
The size of this roaster can roast about 50g-150g no problem. Maximum it could probably go 200g but haven't tried at this point. From my experience, I prefer roasting 100g as that gives me a week of coffee and giving me more learning experience. I will upscale it once I am getting better at roasting.
The best of all is it's very cheap & easy to make. And with a little practice, the result will be just fantastic! No longer you have to

Pic: A full city roast.
Here's a video to satisfy those who are eager for how it actually works:
If any of you do decide to try it out, let me know how it goes for you and we can share some roasting tips!
P/S: My inspiration actually came from this roaster (FZ-RR-700 -Click the link) from Israel.